
GUI

Note: If any window exists in the GUI field, pressing ESC always closes the top-most window.
Note: Pressing ESC when no window is active is equivalent to RUN. It will not function if no game is loaded.
- Notes on the filename box where you can manually type in the filename:
- - Typing text into the box will automatically seek to the closest matching filename in the box where the file selection cursor is located.
- - When you press enter with text in the box without any '\' or ':' in the filename, ZSNES will first look for a directory matching the text and will then change its directory if one is found. Otherwise, it will load the current file or directory highlighted by the selection cursor.
- - You can type in the full filename or directory including path (eg. "d:\games\mario.smc" or just "d:").
Game Menu
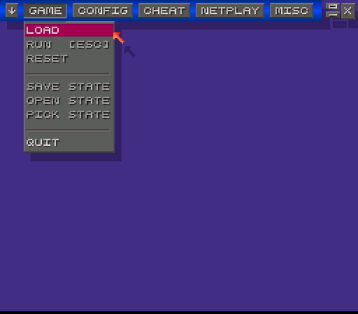
- Load:
- Perform: Loads and runs a file.
- Usage:
- Loading a File:
- You can move through the list using either the mouse or the keyboard. The keys for the keyboard are:
- Up/Down - Move Up/Down through the list.
- Left/Right - Switch between the File and Directory Window.
- PageUp/PageDown/Home/End - Move through the list in larger increments.
- A .. Z, \, : - Enters filename/directory into the load box.
- Enter - Load file or change directory (depending on which window you are in).
- You can move through the list using either the mouse or the keyboard. The keys for the keyboard are:
- Show all Extensions:
- This will force the GUI to show all of the file extensions instead of the default (.smc, .sfc, ...).
- Force:
- Make ZSNES treat a ROM as NTSC or PAL region format, as well as LoROM and HiROM.
- Loading a File:
- Run:
- Perform: Runs the game.
- Reset:
- Perform: Resets the game, but asks user for confirmation first.
- Save State:
- Perform: Saves the state (equivalent to default F2), but asks user for confirmation first.
- Load State:
- Perform: Loads the state (equivalent to default F4), but asks user for confirmation first.
- Pick State:
- Perform: Allows user to select the state position to use (equivalent to default F3).
- Quit:
- Perform: Quits ZSNES.
Quick Menu
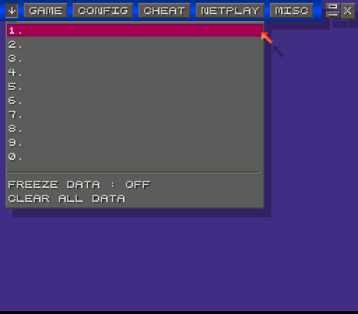
- Numbers:
- Perform: Choose a game to load.
- Usage: Allows the user to quickly select the last 10 games loaded off the GUI. The most recently loaded game will be at the top of the list.
- Freeze Data:
- Perform: Choose whether games are added to this list when loaded from the GUI.
- Usage: If freeze data is on, the list will not change when you load a new game.
- Clear all data:
- Perform: Erases the current quick-load list.
- Tip: You can create a favorites list by first clearing the list, loading all the games you want on the list one by one, then turning freeze on.
Config Menu
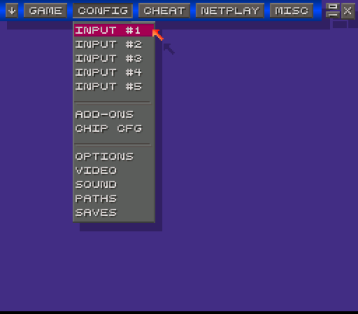
- Input #1-#5:
- Perform: Allows user to select the input device and control keys for each player.
- Usage:
- Selecting an Input Device:
- Using your mouse, move through the list of input devices until the device of your choice is highlighted. From there, click on SET and the input device you selected should appear after CDV: (CDV = Current Device).
- Changing default keys:
- Click on the key which you want to change by using your mouse and then press the key or joystick button/pad which you want to change it to. Pressing ESC disables the game key.
- Selecting an Input Device:
- Add-ons:
- Perform: Changes the current special input selected for the game.
- Usage:
- None - Uses the regular SNES controllers.
- SNES Mouse at Port #1 - The controller in port one will be an emulated SNES Mouse.
- SNES Mouse at Port #2 - The controller in port two will be an emulated SNES Mouse.
- Super Scope - Emulates the SNES Super Scope.
- Lethal Enforcer Gun - Simulates the SNES Mouse movements for Lethal Enforcers 1.
- Chip CFG:
- Perform: Configure the Super System settings.
- Usage: Set which Super System DIP switches are enabled.
- Options:
- Perform: Allows the user to select some in-game options.
- Usage:
- Auto Frame Rate - Enables auto frame rate.
- Max Frame Skip - Shown only when auto frame rate is enabled, this sets the maximum allowable frame skip in auto frame rate mode.
- Frame Rate - Sets the constant frame skip value used when a game plays. This is only shown when auto frame rate is disabled.
- New Gfx Engine - Enables/Disables the new graphics engine in 256 color modes or 320x240x65536 mode.
- MMX Support - Enables MMX copying routines for a slight speed increase (MMX processors only).
- Use Pl3/4 as Pl1/2 - Allows the user to use 2 devices for 1 player, such as the keyboard and the joystick. (set keyboard as input device 1 and joystick as input device 3). This, however, disables MultiTap support.
- High Priority Mode - Enabling this will allow ZSNES to take up more of the CPU resources to increase speed; however, it will reduce the amount of resources given to applications running in the background.
- FPS at Program Start - Checking this will make the FPS appear whenever you start ZSNES.
- Use 30Hz for Turbo - When activated, turbo will change at 30hz NTSC or 25hz PAL. Otherwise, turbo will change at 60hz NTSC or 50hz PAL.
- Enable Game Clock - Enabling this will show the system clock on-screen.
- Toggled Fast Fwd/Slowdown - Checking this will change the way how the fast forward button functions. Having it checked will cause it to act as a switch and having it unchecked will cause it to act as a push button.
- Old Gfx Mode 2 - This will enable the Old Gfx Engine Mode 2, which fixes many transparency bugs that currently plagues ZSNES in the current engine. However, it also creates some new ones. This mode can be slower at times, so it's recommended that you only turn it on when you need it.
- Don't Save Current Path - This will prevent ZSNES from changing the current start-up game path in the configuration.
- Use Small Message Text - On-screen messages that pop up when you save a state, disable a background, ect. will be smaller.
- Enable Auto-Patch - When checked, ZSNES will automatically soft patch ROMs when a corresponding .ips file is found.
- Enable ROMINFO.TXT - When checked, ZSNES will create a file named ROMINFO.TXT when you load a ROM. This file contains information about the ROM.
- Disable Screensaver - Disables the screensaver while ZSNES is running, so that your gameplay will not be interrupted if you're using a gamepad.
- Video:
- Perform: Changes the current video mode and sets some options.
- Usage:
- Changing the video mode - Use the mouse to select the video mode and click 'SET'. If the resulting video changes don't look right, wait for 10 seconds without pressing any key or button and the display will return to the previous one.
- Full Scanlines - This mode adds a blank line in between every line to produce a scanline effect similar, if not exact, to a TV.
- 50% Scanlines - This will enable scanline mode, except that each line is 50% darker than the line above it.
- 25% Scanlines - This will enable scanline mode, except that each line is 25% darker than the line above it.
- 2xSaI Engine - Setting this will enable Kreed's 2x Scale Advanced Interpolation engine.
- Super Eagle - Setting this will enable Kreed's Super Eagle engine.
- Super 2xSaI Engine - Setting this will enable Kreed's Super 2x Scale Advanced Interpolation engine.
- HQ2X, HQ3X, and HQ4X - Depending on what D mode resolution you are using, you will be able to enable one of these three graphic filters created by MaxSt.
- Interpolation - Setting this enables interpolation, which basically blends all the inbetween colors to produce a blurry effect. However, this slows down emulation.
- Hi-resolution Mode 7 - Enabling this will activate high resolution mode 7 whenever standard mode 7 is used within a game. This mode is only available in video modes that support it.
- Grayscale Mode - Makes the game display in monochrome color, i.e. black and white. This option is just there for fun and is not something that you probably want to keep on using.
- Triple Buffering - Uses an extra buffer for drawing. Thus, a buffer can be drawn on while one is pending Vsync, and another is being drawn. The primary use is to reduce the impact of Vsync on slower systems.
- Vsync - Synchronizes drawing to the monitor's refresh rate. This may reduce frame rate on your computer, but will reduce tearing.
- Sound:
- Perform: Allows user to change the sound configurations of ZSNES.
- Usage:
- Enable Sound - Setting this turns on the sound.
- Stereo Sound - Enables stereo sound (slower unless you have a fast CPU).
- Sampling Rate - To change the sound sampling rate, just click on the box containing the value to rotate through all the possible values. The default sampling rate (and the one that is most accurate to a real SNES) is 32000hz.
- Volume Level - To change, just slide the bar.
- Reverse Stereo - This function swaps the L and R volume levels in stereo mode.
- Surround Sound - Enables simulated 2 speaker surround sound.
- Sound Buffering - Enable to provide a larger sound buffer for sound cards that have problems with the sound.
- Sound Buffering - Enabling this may reduce/prevent sound crackling on some computers.
- Disable SPC Emulation - Disables the emulation of the SPC700 chip. Doing this will speed up emulation, but the downside is that it tends to bring more sound errors.
- Sound Interpolation - This feature smoothes out the wave forms of lower frequency sounds. Choose either gaussian (default and the most accurate to a real SNES), cubic spline, or 8-point interpolation.
- Low Pass Filter - This produces better bass in certain sound effects. However, the side effect is that the sound will overall be more muffled. Choose either simple, dynamic, or hi quality.
- Paths:
- Perform: Allows user to change the default directories used by ZSNES.
- Usage:
- Saves - Configure the directory in which ZSNES will place SRAM and state save files.
- Snapshots - Configure which directory bitmap (.bmp; 16bit color) and PNG (.png; 32bit ARGB color) format snapshots will save in.
- SPCs - Configure which directory SPC700 sound dumps (.spc; SNES music files) will save in.
- BIOS/Base Carts - Enter the location of BIOS/Base carts here, to support emulation of the BS Satellaview, Sufami Turbo, and the Same Game and SD Gundam G-Next expansion packs.
- SPC7110 Graphic Packs - Enter the directories that contain SPC7110 graphic packs in the appropriate fields here. The SPC7110 games are Far East of Eden Zero (FEOEZ), Far East of Eden Zero - Shounen Jump no Shou (FEOEZ-SJNS), Momotarou Dentetsu Happy (MDH), and Super Power League 4 (SPL4).
- Note: Paths can be absolute (C:\Path\To\File\) or relative (..\Path\Relative\To\ZSNES\).
- Saves:
- Perform: Allows user to configure options regarding state saves and in-game saves.
- Usage:
- Auto Increment Save Slot - When enabled, the save slot will automatically move to the next slot after you save a state.
- SRAM Check+Save - This will enable automatic save RAM write detection and save the SRAM (.srm) to disk approximately 10 seconds after.
- Start at Latest Save - Checking this will automatically set the save state pointer (F3 Menu) to the most recently saved location whenever you load a ROM image.
- Auto State Save/Load - Enabling this will allow ZSNES to automatically re-load the state whenever you return back to the game after a proper exit.
Cheat Menu
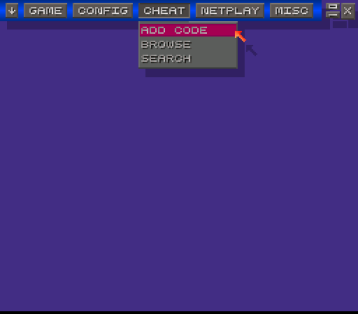
- Add Code:
- Perform: Enters the cheat code window and sets the keyboard cursor on the cheat code entry box.
- Usage: Type in the code in either Game Genie, Pro Action Replay, or GoldFinger format, then press enter. Then enter the description. Note : Be sure to include the '-' when entering Game Genie codes.
- Note: You can also quickly modify the value of the currently selected cheat code (in the browse window) by typing a 2 digit hex number in the cheat code enter space.
- Cheat Code Reflector - What this feature does is that it allows a value of one cheat code to be mirrored from a value of another cheat code. To enable this option, type an 'R' at the end of any cheat code as the destination, then type another cheat code (Without the 'R') as the source. For example, if you want address 7E1000 to reflect the value at address 7F2000 (whatever value written to 7E2000 from the game will also be written to 7E1000), enter cheat code 7E1000FFR, then cheat code 7F2000FF (where FF can be any value).
- Browse:
- Perform: Enters the cheat code window and sets the keyboard cursor at the browse box.
- Usage: Move through the list using either the mouse or keyboard and select the cheat code you want to modify. Then click on the buttons to the right or type in the key of the first letter of the action.
- Actions:
- Toggle - Turns a cheat code on or off.
- Remove - Deletes the cheat code off the list.
- Save - Saves the current list into a .cht file, which will be located in the save directory.
- Load - Loads a previously saved list.
- Fix - Clicking this fixes some cheat codes that don't work, but it will not always work.
- You can also toggle a cheat code on or off by double clicking on them.
- Actions:
- Search:
- Perform: Allows you to search for values in memory such as life, score, etc. and allows you to change their values to your own preferred choice.
- Usage:
- Select Size: You can choose what data size to search for. If you know the numerical values of the data you're going to select, select the smallest number range that fits the data values. (eg. If you know the value cannot go higher than 50000, then select 2 BYTES (0..65535) instead of 3 BYTES (0..16777215)). Sometimes, you don't know the numerical value (in the case of life bars) so you have to guess the size.
- Select Format: DEC (Decimal, 0 .. 9), HEX (Hexadecimal, 0 .. F) Most of the time, it's recommended that you'd use decimal, although there are some cases that the values in memory are sometimes stored as hex.
- Search Type:
- Exact Value Search - In this mode, you have to enter the exact numerical value that you want to search for. Such as if you have 3 lives left, then search for the value 3. The cheat search engine also looks for value - 1 since even if a game tells you that you have 3 lives left, it stores the value as 2 in memory.
- Comparative Search - In this mode, you select whether the value is less than, greater than, equal to, or not equal to the previous value. Such as if you have a life bar and if the life bar suddenly goes down, go back to the cheat search engine and select less than to search for any value that has been decreased.
Netplay Menu
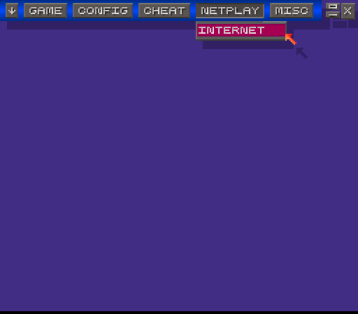
- Internet:
- Port -
- This is the port ZSNES will communicate on. While the number can range from 0 to 65535, it is recommended you stay above 5000 to avoid conflicts with other services.
- Nickname -
- What you will be called.
- Start As Server -
- This will start the ZSNES Server. Your opponent can then join via the Connect to Server option.
- IP -
- This is the IP of the server you wish to connect to. You will need to receive this information from the person to whom you are connecting.
- Connect to Server -
- This will connect you to another ZSNES user if the port and server are correct. This is only used on the client side.
- Your IP -
- This is your IP. The client doesn't really need to do anything with it. The server needs to give this information to the client.
- Allow UDP Connections -
- UDP is slightly faster than TCP, and should provide a better experience. Some users, however, can only use TCP. Turn this off if you are experiencing connection problems in mid-game, and see if it helps.
- Port -
Misc Menu
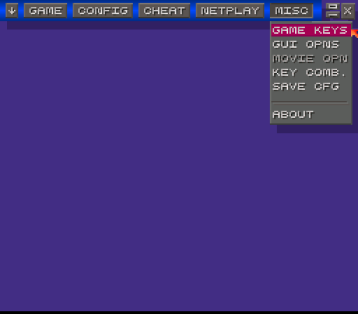
- Game Keys:
- Perform: Allows user to change and make game keys and quick keys to his own preference.
- Usage:
- Click on the key which you want to change using your mouse, and then press the key or joystick button/pad which you want to change it to. Pressing ESC disables the key.
- GUI Options:
- Perform: Allows the user to customize some of the GUI.
- Usage:
- Mouse Wrap - Allows the mouse pointer to wrap at the borders of the screen.
- Mouse Shadow - Disables/Enables the Mouse Shadow.
- Keep Menu Positions - When enabled, re-entering the GUI from the game does not automatically enter the Load Menu, but instead the previous menu which you were on when you last exited the GUI.
- Save Window Positions - When enabled, the GUI doesn't reset the locations of the windows when you exit/enter the GUI.
- Click Enters GUI - When enabled, clicking the right mouse button will switch to and from the GUI when running a game. This however, slows down emulation by a bit since it has to check the mouse button status once in a while. If you are running in a windowed video mode, the right click button won't return back to the game.
- Use JoyPad1 to Control - When enabled, it allows Player 1's device to be used to move through the GUI. This is mainly used if you want to use your joystick in the GUI. The equivalent SNES keys to the keyboard keys are:
- SNES ControlPad = Move
- SNES A = Enter
- SNES B = ESC
- SNES L = PageUp
- SNES R = PageDown
- Transparent Messages - Makes in-game messages appear transparent.
- Wheel Mouse - Enables or disables the mouse wheel.
- Filtered GUI - Use your favorite ZSNES display filters in the GUI. ZSNES, HQ3X style!
- Trap Mouse Cursor - Prevents the mouse cursor from exiting the ZSNES GUI. You will have to move the mouse with extra speed to make the cursor exit the GUI with this feature enabled.
- Snow Effect - Enables the snow effect in the GUI background.
- Water Effect - Enables one of the two available water effects in the GUI background.
- Burning Effect - Enables the burning effect in the GUI background.
- Color - Allows you to customize your ZSNES GUI colors. Background, title bar, and window colors are supported.
- Always on Top - Puts the ZSNES window on top of almost all other Windows applications at all times.
- Save Main Window Position - Saves the window position when you exit and restores it when you load ZSNES again.
- Allow Multiple Instances - Allows you to load more than one ZSNES window at a time.
- Key Comb. (Key Combination Editor):
- Perform: Allows you to specify certain keyboard combination routines with a single keystroke/joystick button press.
- Usage:
- Description - Allows you type in the description of the combination key.
- Key - Clicking on this box will allow you to select which key/button to use.
- Combination Keys - This window will display the sequence of events selected by the user.
- P# - Selects which player # will use those keys.
- > = Last </> - Enabling this would mean that the event symbol > will mean the last left or right direction the user presses in the game and the symbol < is the opposite of that direction. When disabled, > means right and < means left.
- Game Specific (Game Specific) - Enabling this will tell ZSNES to use separate key combination files for each individual game.
- Clear - Clears the current key combination field.
- Add - Adds the key combination fields below as a new entry.
- Replace - Copies the contents of the key combination fields below to the current highlighted key combination above.
- Delete - Deletes the highlighted key combination above.
- Events:
- Press+Rel - The key will be pressed and held. It will be released once another key is pressed after any amount of frame or second delay.
- Press Only - The key will be pressed and held.
- Rel Only - The key will be released if it is pressed by a press only event.
- Frame Delay - Delays for the specified number of frames.
- Second Delay - Delays for the specified number of seconds.
- Del - Deletes the event at the end of the combination keys list if one exists.
- Note: A 1 frame delay exists after the combination key list has finished processing.
- Example Key Combination: (Down / Down+Right / Right / L):
- Method 1:
- Press+Rel Down / 2 Frame Delay / Press+Rel Down / Press+Rel Right / 2 Frame Delay / Press+Rel Right / 2 Frame Delay / Press+Rel L
- Method 2:
- Press Only Down / 2 Frame Delay / Press Only Right / 2 Frame Delay / Rel Only Down / 2 Frame Delay / Rel Only Right / Press Only L
- Method 1:
- Movie Options:
- Perform: Allows you to record SNES movies so that you can play them back at a later date either to amuse your friends, torture your friends, or whatever. Just don't play anything in front of your enemies since they might break your computer. ;)
- Usage:
- Movies are saved as .zmv, .zm1, .zm2, etc. files. They should be located in the same directory as your save files. A movie file consists of a save state file, SRAM data, and the recorded controller data. The initial filesize of a .zmv file is the combination of a .zst and a .srm file (around 300kbytes), and it averages around 7kbytes/minute (value varies) or 420kbytes/hour.
- You can record:
- - Standard 1/2 player games
- - 3-4 player MultiTap games
- - SNES Mouse games
- - Network/Modem games
- You cannot record:
- - Super Scope games
- Movies are saved as .zmv, .zm1, .zm2, etc. files. They should be located in the same directory as your save files. A movie file consists of a save state file, SRAM data, and the recorded controller data. The initial filesize of a .zmv file is the combination of a .zst and a .srm file (around 300kbytes), and it averages around 7kbytes/minute (value varies) or 420kbytes/hour.
- GUI Usage:
- Record - Begins recording the movie file.
- Play - Begins playing the movie file.
- Stop - Stops the movie process.
- The numbers at the right side select which movie file to play/record.
- NOTE: Movies recorded without sound cannot be played when sound is enabled and vice versa.
- NOTE: Loading another game, loading a state, or resetting the game will halt the play/record process.
- NOTE: When you play a movie file, the SRAM data becomes invalid, and ZSNES won't save it until you load a game. This way, you don't have to worry about your SRAM when you load up a movie file.
- Save Cfg:
- Perform: Saves the configuration files.
- About:
- Perform: Just displays the version # and the authors of ZSNES.

